-
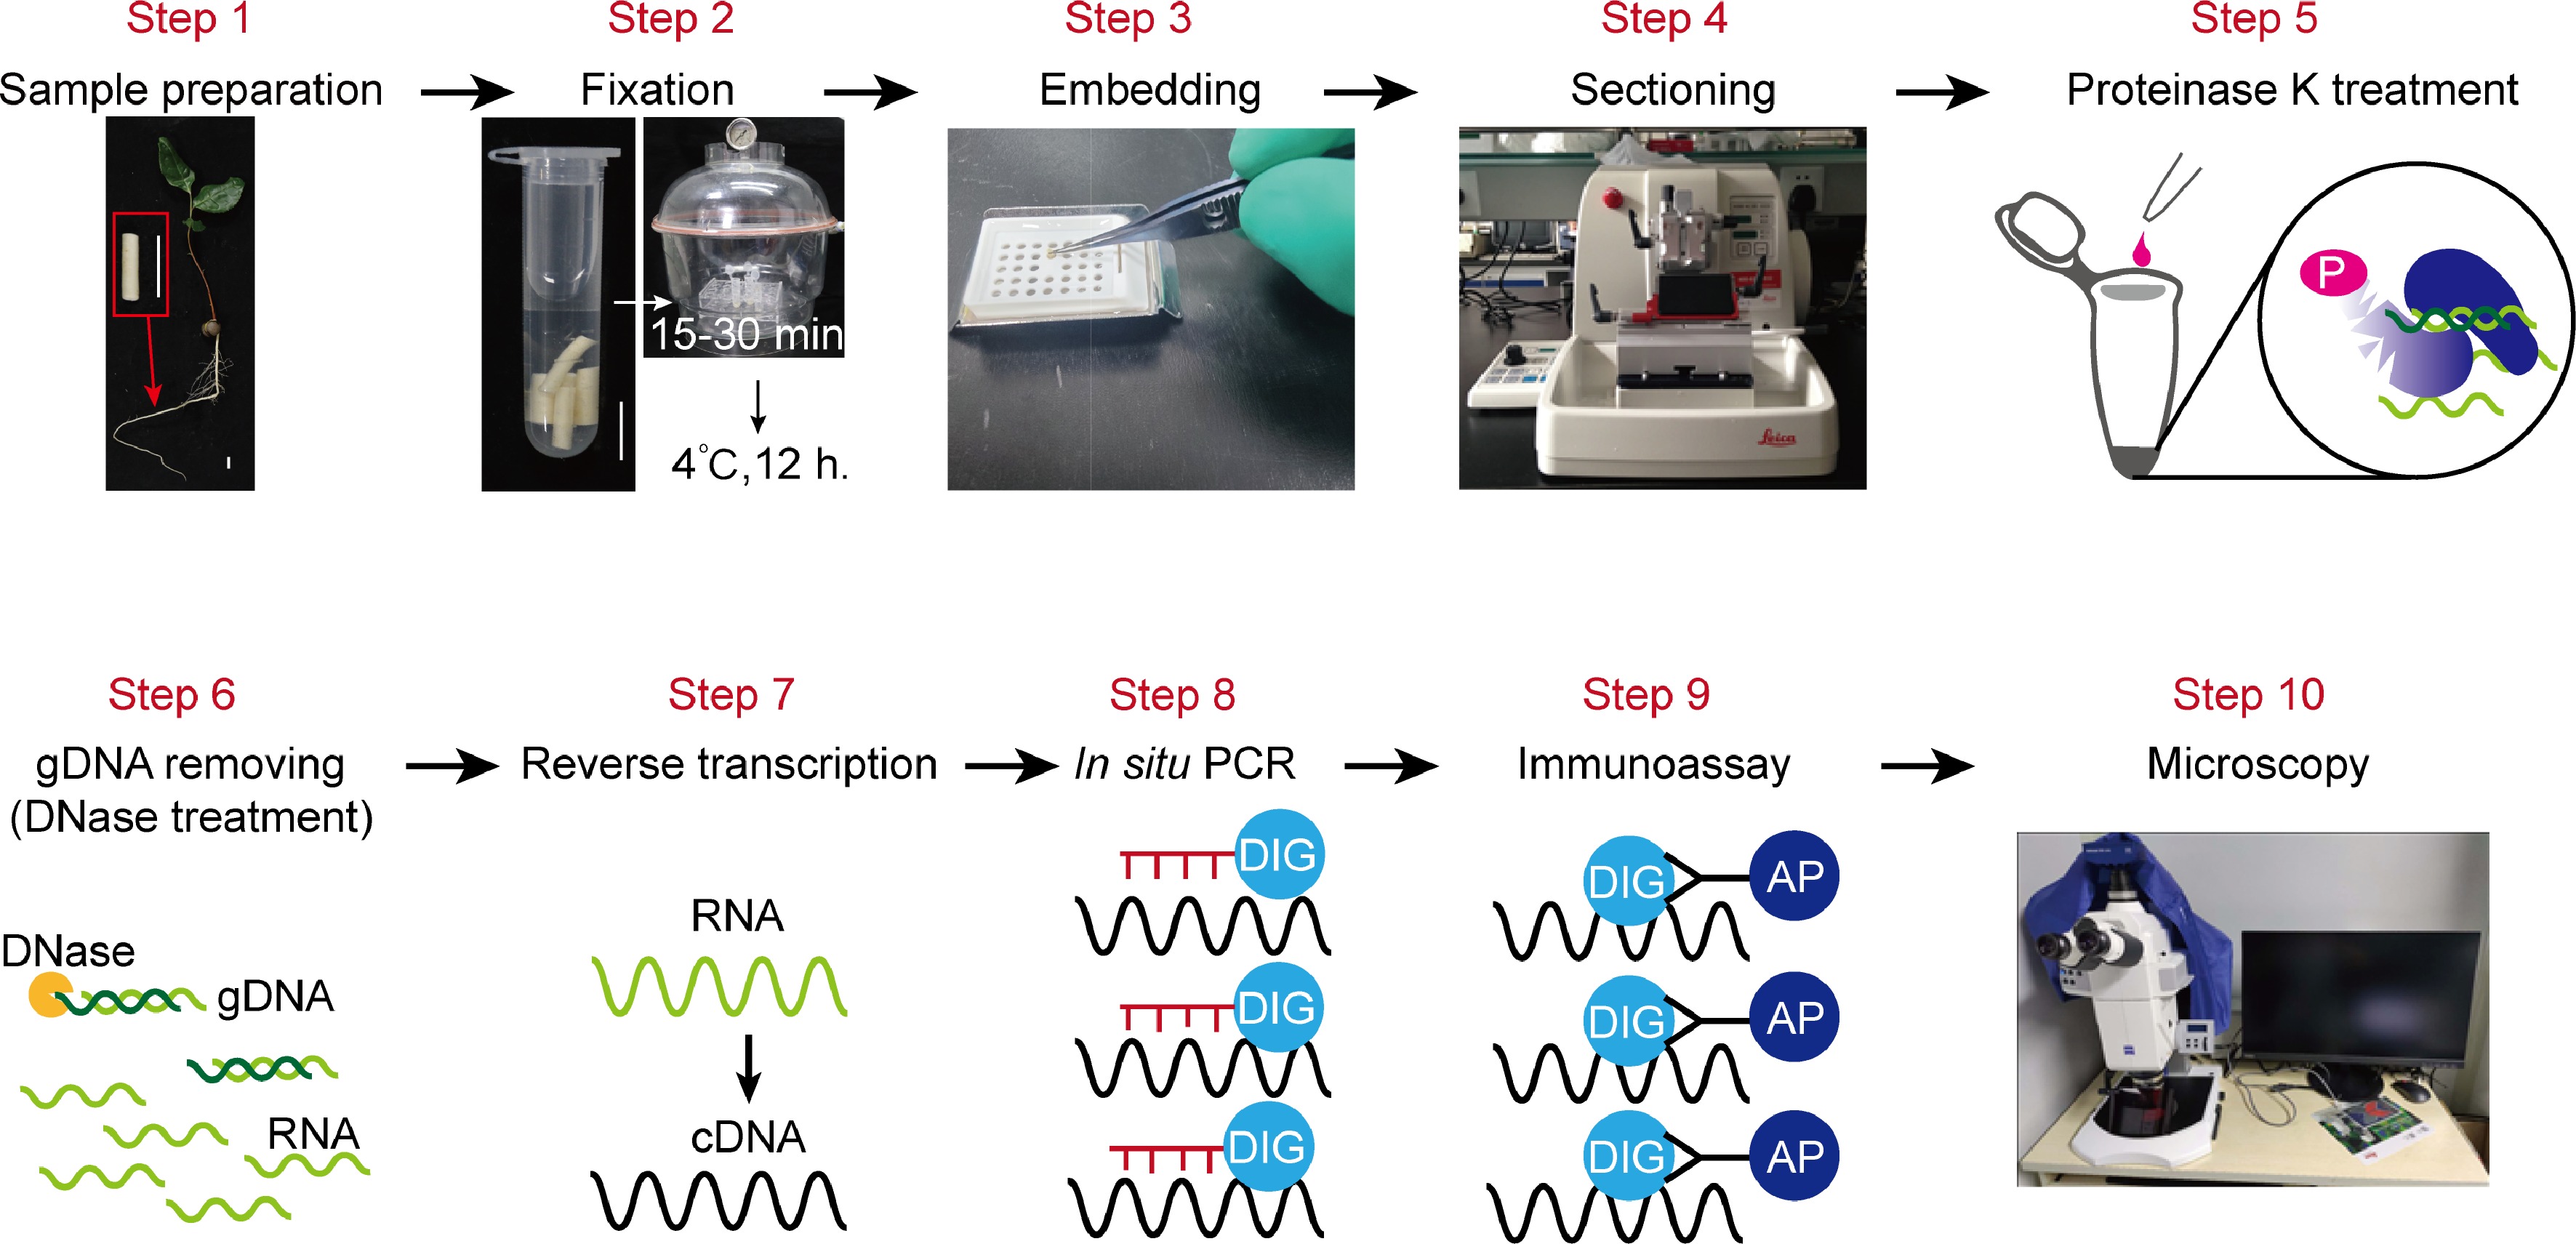
Figure 1.
An overview of the in situ RT-PCR procedure. This illustration summarizes all the steps to carry out experiment. This includes: Step 1, Sample preparation; Step 2, fixation; Step 3, embedding; Step 4, sectioning; Step 5, proteinase K treatment for digestion; Step 6, Genomic DNA removing through DNase treatment before reverse transcriptase-PCR (RT-PCR); Step 7, reverse transcription; Step 8, PCR-amplification of target gene fragments; Step 9, immunoassay; Step 10, imaging of sections by using microscopy.
-
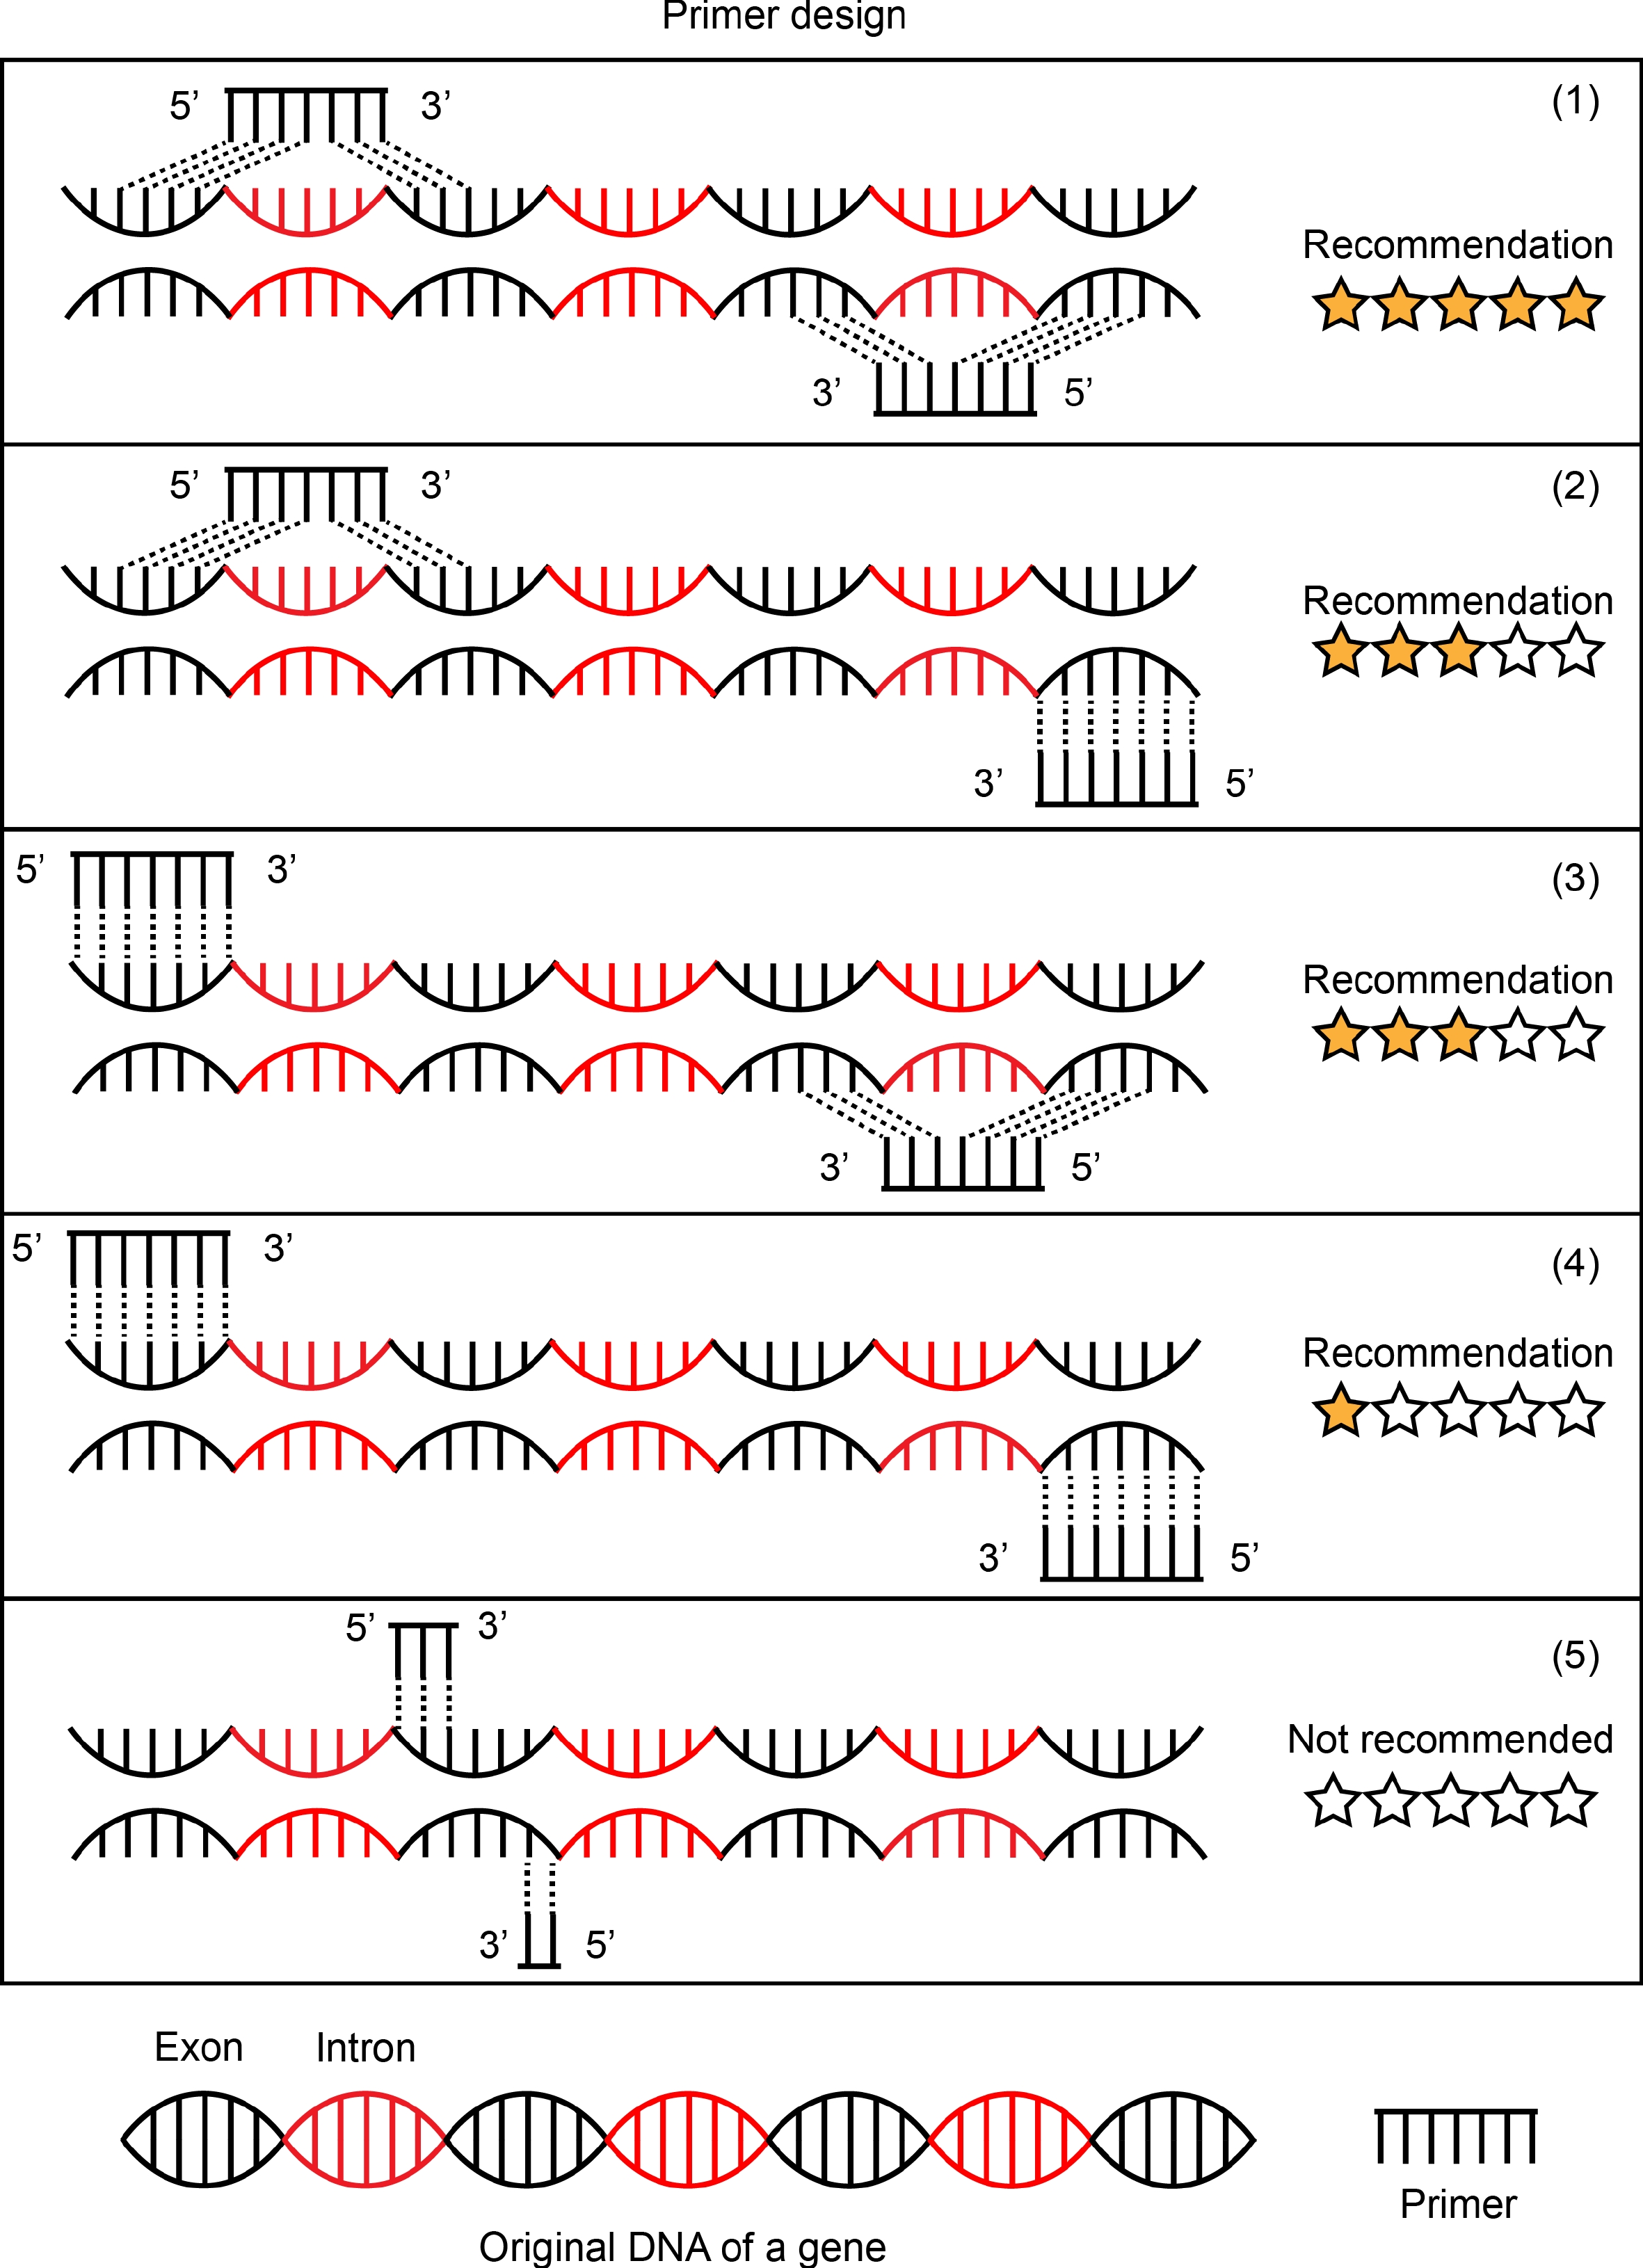
Figure 2.
Schematic representation of primer design. Five forms of primer design are listed in this picture. (1) Forward primer and reverse primer targeted mRNA sequences by designing the primers to span introns in the genomic DNA. This is an ideal primer design and is recommended. (2) and (3) are common forms of primer design and are recommended in most cases. Forward primer and reverse primer, one of two, to be designed to targeted mRNA sequences and span introns in the genomic DNA. The primer design of (4) is chosen if there is no better design scheme of a target gene. Forward primer and reverse primer were designed to target two exon sequences separated by a distance respectively. (5) Forward primer and reverse primer were designed in the same exon sequences. This is not to be recommended.
-
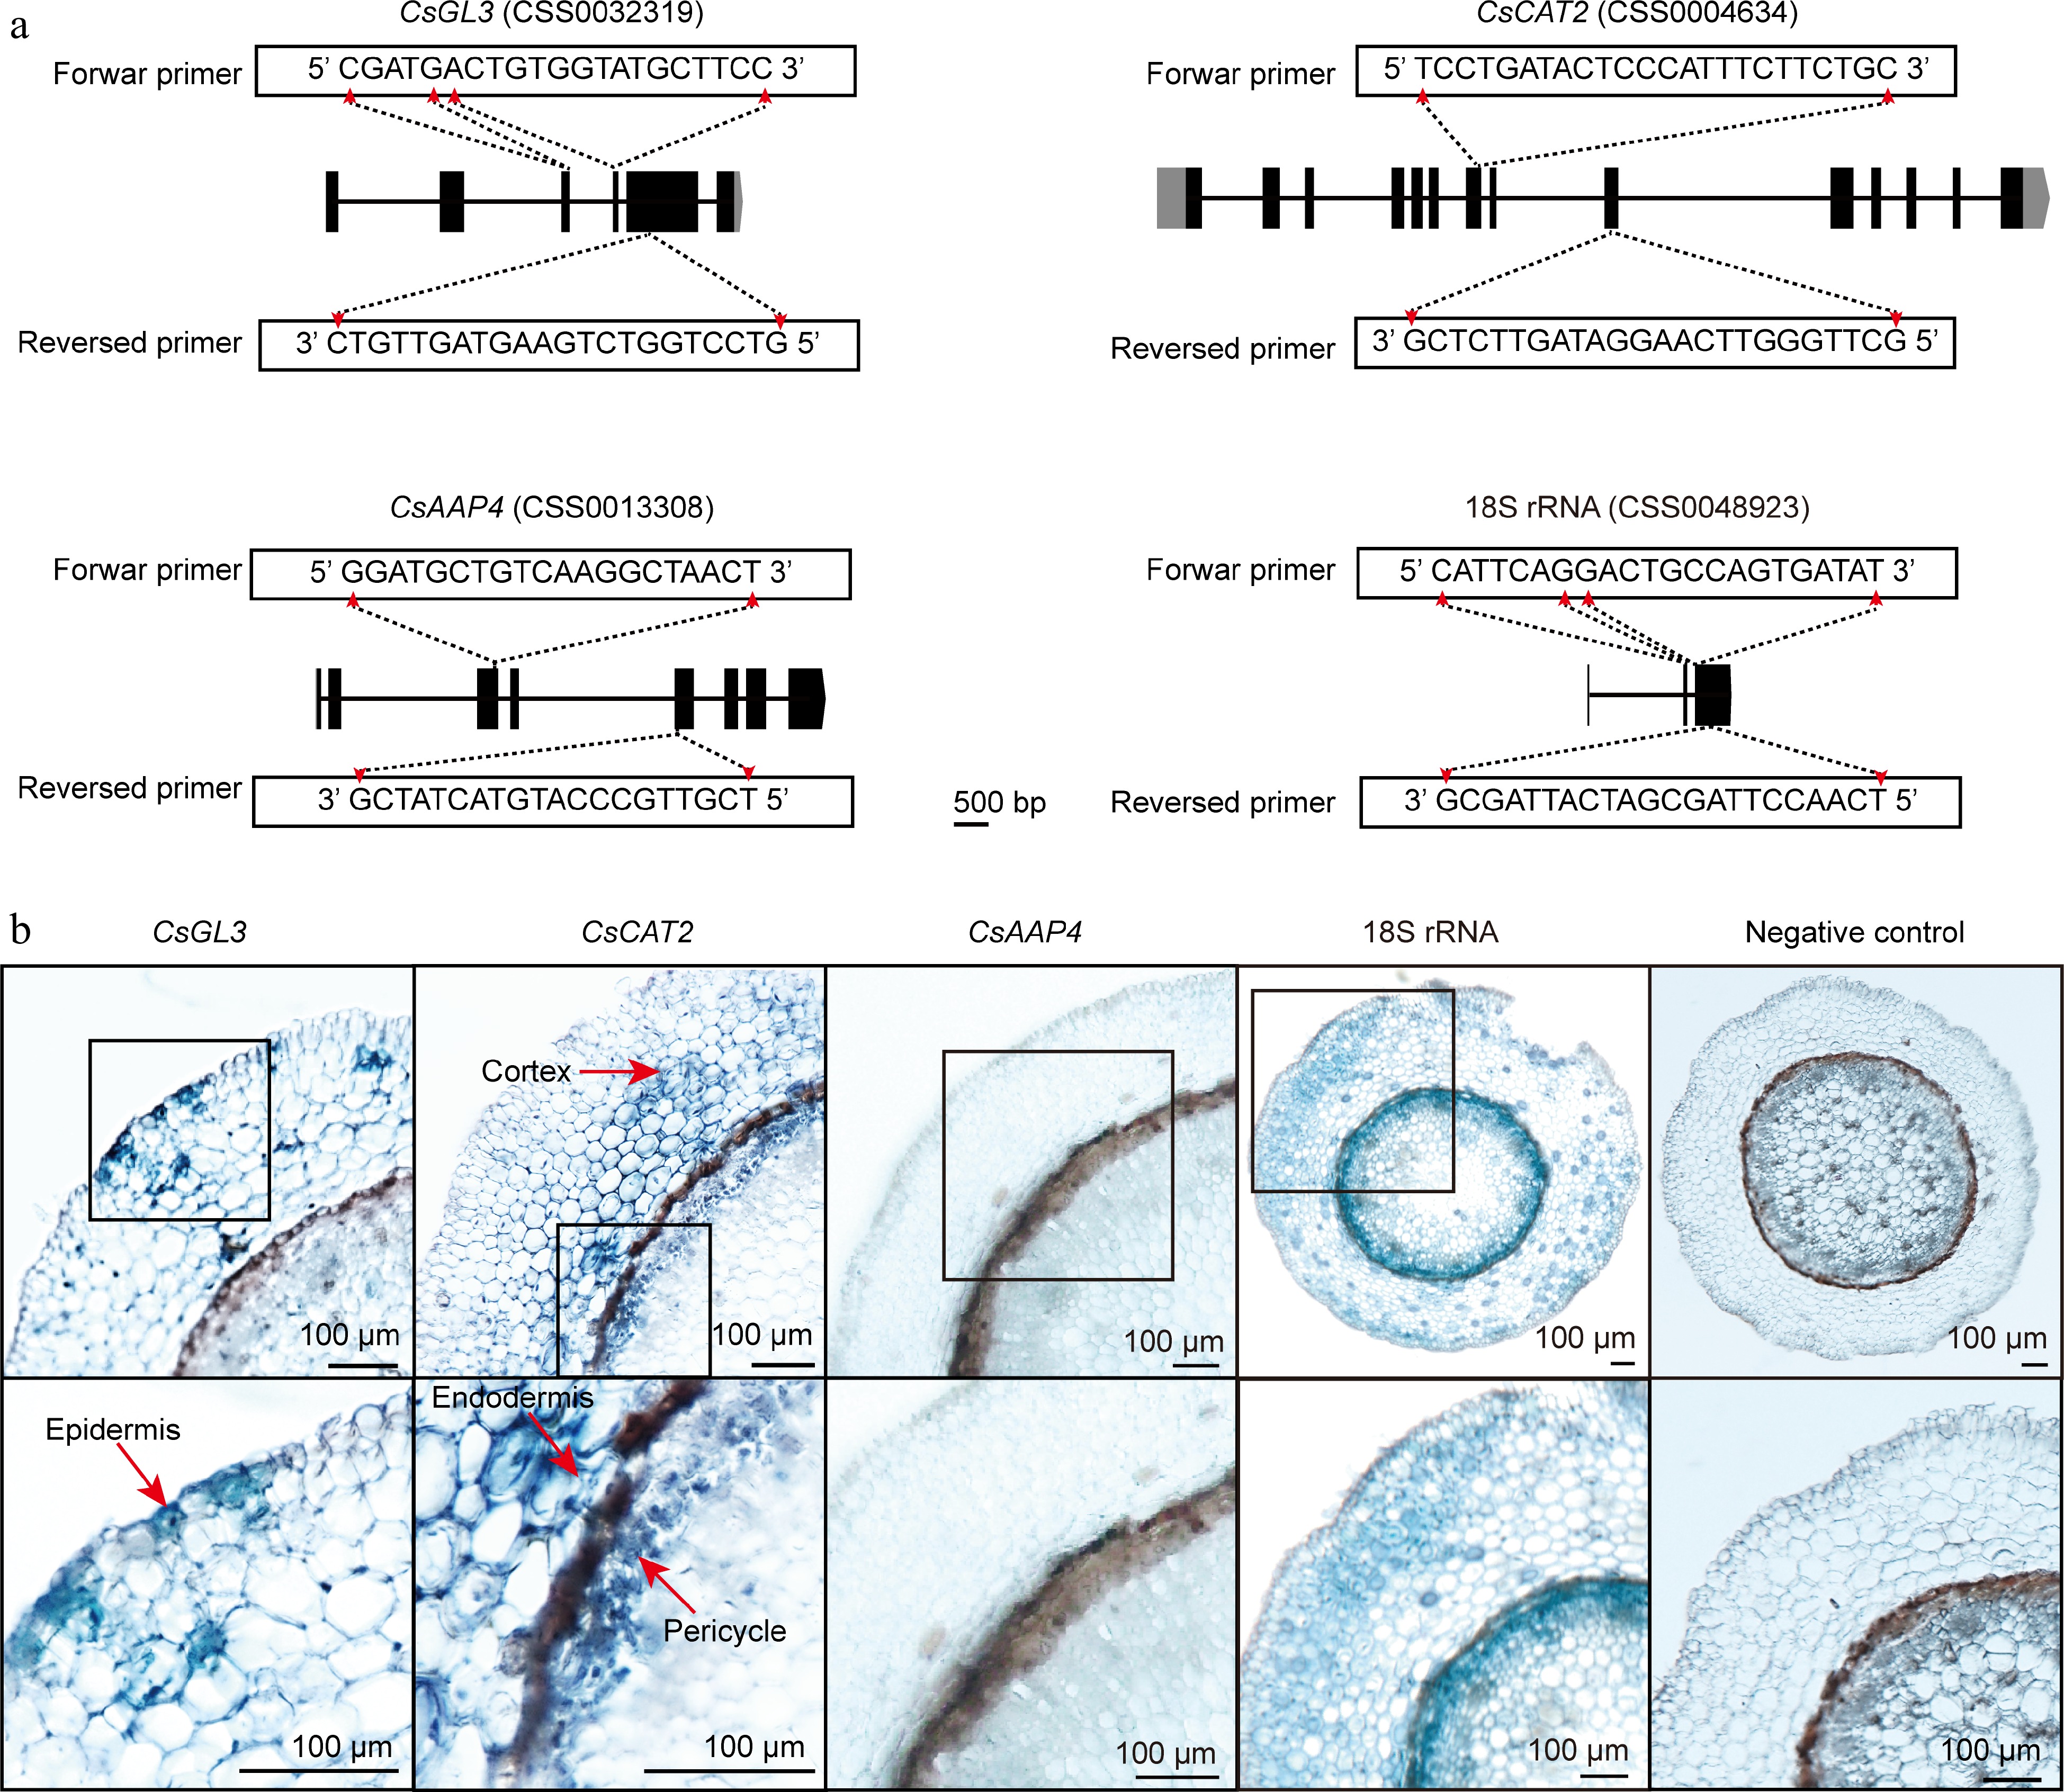
Figure 3.
In situ RT-PCR detection of genes mRNA in tea plant root sections. (a) Primer design of CsGL3, CsCAT2, CsAAP4, and 18S rRNA. (b) The blue areas of sliced tissue represent regions where CsGL3, CsCAT2, CsAAP4, and 18S rRNA are expressed. The black box represents the magnified areas of root sections. Red arrows point to the cell type in which the gene is expressed. Using water replaced gene specific primers in PCR as negative control. Scale bar = 100 μm. Each sample is an independent root section and to be detected in separate 0.2 ml centrifuge tubes.
Figures
(3)
Tables
(0)